5 Things the Best Shed Work Benches Have in Common

Quick Navigation
WHEN THE TIME COMES to build a shed work bench…
Far too many guys get caught up in trying to decide what it should look like.
Many try to build one similar to the many standard designs that have endured the ages or are used by the pros. While this might sound good in theory, the reality is that these “standard” work benches may not fit your specific needs.
Remember, this is one case in which function is far more important than form. After all, when it comes to choosing the right workbench, not everyone undertakes the same types of projects and many of these benches are specific to a particular craft or trade.
Of course, you can use some of the ideas or styles as a good starting point for your shed work bench. But be prepared to step out of the box and build yours to suit the range of projects you have in mind.
1. Consider the Tools You Will Be Using…

One of the most important things the best shed work benches have in common is that they are custom designed to fit the tools, the person who will be working on them, uses on a regular basis.
For example, if you plan to spend the vast majority of your time working with wood, your bench should include a large capacity vise. There are several different style on the market, the best have a solidly mounted, threaded plate for one end and then you drill a series of holes along the surface of the bench for the stationary plate.
This type of vise lets you work with an incredible range of wood sizes.
Consider building your rip saw into one end of the bench as this gives you added support for larger pieces of wood. The same can be said for mounting a compound miter saw on one side of the bench.
By mounting the saws into your bench you have more room to work with and they are solidly held in place to reduce the risk of errors when cutting.
2. A Good Bench Top is the Key to Quality
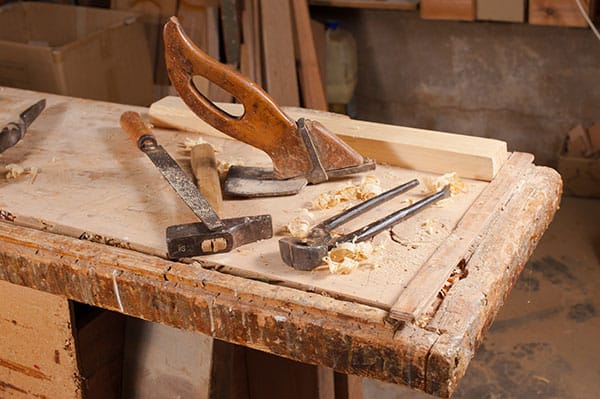
The top needs to be nice and flat, tough and preferably replaceable so that as it becomes damaged over time, you can easily remove it and put a new top on.
No matter how you plan to attach the top, there should never be any screws or nails sticking out of it because these while only end up damaging your next project.
Add enough support under the top to keep it flat and true, anything less will show up in your finished projects as misaligned joints, warped boards, or poor finishes
If you are going to incorporate power tools into the benchtop design, be sure there will be plenty of open workspace between them.
There is nothing more frustrating than trying to work on a larger project only to end up working on the floor because there is not enough room on the benchtop to maneuver the project around while working on it.
3. Sturdy Foundation – Get Started on the Right Foot

Woodworking calls for exceptional accuracy, so the last thing you need is a workbench that wobbles while you work.
The frame for your work bench needs to be built from sturdy lumber such as 4 x 4 legs with plenty of 2 x 4 bracing. Alternatively, you can build the frame from 2 x 4s and then cover it in plywood for the added stability.
Since you are going to be pounding on the top of the workbench, the last thing you need is a shaky foundation. Think of the framework for your shed work bench along the lines of the foundation of your home. If the foundation is weak, the rest of the house will be very shaky.
Incorporate plenty of bracing while building the frame to give your entire work bench the foundation it needs to support any task you are likely to take on. You may even want to consider bolting your workbench to the shed floor for added stability.
4. A Place for Everything – and Everything in its Place
If you are like most guys, you probably have more hand and small power tools than you realize.
Come on admit it, you simply can’t seem to stop adding to your collection and it seems each new project takes some kind of new tool. Well, you can’t just leave all these tools lying around to get lost or damaged, you need somewhere to store them.
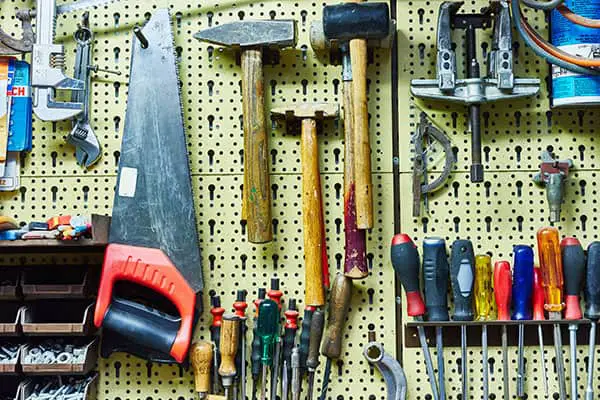
Some of the bigger tools can go under the bench in drawers or tubs out of the way until needed. However, the best way to store your hand tools like screwdrivers, saws, wrenches, chisels, files, hammers and so forth is on a peg-board.
There are literally dozens of different sizes of hooks, custom screwdriver racks, and bins made to be hung on pegboards.
You may even want to draw an outline of each tool once it is hung in place to ensure your tools always get put away properly. This is also a great way to see if anything is missing and what it is.
5. Take Care of the Hardware

Over the years, your shed has probably accumulated enough hardware such as screws, nails, nuts, and bolts to stock your local hardware store.
Part of this comes from not being able to find what you need when you need it, resulting in yet another run to the store for those brads you were sure you had. This gets expensive after a while, but there is a better way.
There is a huge variety of nut and bolt bins on the market available in virtually any size and configuration to meet your needs.
These bins can be mounted on the wall, attached to your pegboard or simply stacked at the back of your workbench. Barring this, you can use mason jars as storage containers. Not only do they come in different sizes to meet your needs, but you can clearly see what’s in them.
The only bad thing about using jars is that they are glass and break easily. Of course, you can screw the lids to a beam and then keep everything neatly up and out of your way.
[tcb-script type=”text/javascript”]amzn_assoc_placement = “adunit0”;amzn_assoc_enable_interest_ads = “true”;amzn_assoc_tracking_id = “zacsgarden-20”;amzn_assoc_ad_mode = “auto”;amzn_assoc_ad_type = “smart”;amzn_assoc_marketplace = “amazon”;amzn_assoc_region = “US”;amzn_assoc_linkid = “1f306f4c17734d0a93faeab7af8890cb”;amzn_assoc_emphasize_categories = “228013”;amzn_assoc_fallback_mode = {“type”:”search”,”value”:”screw storage”};amzn_assoc_default_category = “All”;[/tcb-script] [tcb-script src=”//z-na.amazon-adsystem.com/widgets/onejs?MarketPlace=US”][/tcb-script]Now onto Your Shed Work Bench
Having read through all of this, do you think you are ready to buy or better yet build your next shed work bench? Considering other accessories fro your shed?
These are the steps I used in designing and building my own custom workbench because I simply could not find one on the market that truly met my needs. I spent a lot of time browsing different magazines and looking at various designs.
All of the information above was used in making my final decision. If you have enjoyed reading this and it has helped you with your designing your next work bench, please let me know by leaving a comment here and sharing this article with your friends and family. Cheers!
Resources:
Related Articles: