How to Lay a Gravel Shed Foundation
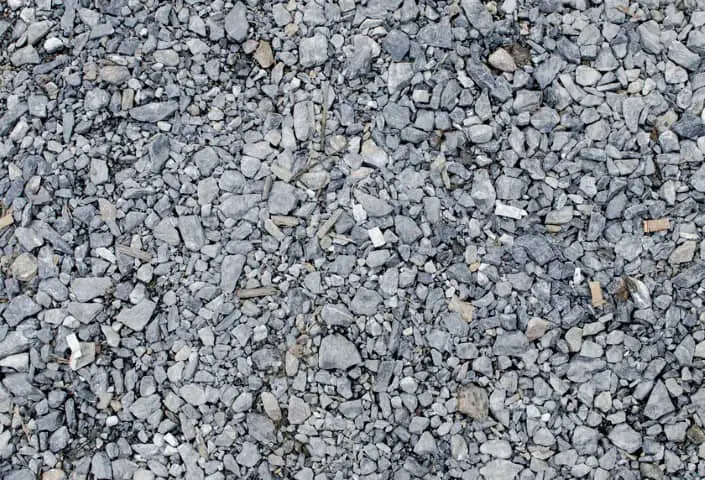
Stone Gravel
Quick Navigation
THE MOST POPULAR FOUNDATION material for a shed is gravel. It's easy to work with, lasts virtually forever, is environmentally friendly, and most of all a gravel foundation will provide exceptional support for your shed.
More importantly, most of today's shed manufacturers recommend you build a gravel shed foundation before they deliver your shed to you. Here are three very important reasons why you should plan on building a gravel pad for your new shed:
Load Carrying Ability
One of the reasons a gravel foundation is one of the most popular choices for garden sheds is that it allows you to spread the weight of your shed and everything it in over the surface of the entire foundation. Other forms of shed foundation such as concrete piers focus all of the weight on smaller areas putting more stress on the framework of your shed, increasing the risk of significant damage.
Level Ground
Even if your backyard is not level or has a small amount of slope to it, a gravel pad gives you the opportunity to create a solid level base upon which to place your shed. By using a wood frame, you can overcome a reasonable amount of slope.
Closer to the Ground
Concrete piers, wood frame foundations, even concrete slabs can raise the floor height of your shed more than you want. Trust me, there is nothing worse than trying to get a lawn mower or other heavy items in and out of a shed that is sitting too high. A gravel shed foundation lets you control the height of your shed and can even let you put your shed at ground level (or at least only slightly above it).
Should I Build a Retaining Wall or Go Free Form?
The next major decision is do you build retaining walls to hold the gravel in place or do you go crazy and make your foundation free form?
As we go through the rest of the process, I will go over the benefits of both forms of a pad. Each has their own unique features and benefits. Some of this decision is based on the space you have to work with, the type of gravel you plan to use, and the quality of the ground in your backyard.
What Kind of Gravel Should You Use?
Let's face it, to most of us, gravel is nothing more than a bunch of crushed up rocks. And while to a certain extent this might be true, there is more to gravel than meets the eye. Gravel comes in a wide range of types and grades, each of which has their uses. There are two main categories of gravel:
The Best Types of Gravel to Use for Your Foundation
21A and 21B Gravel
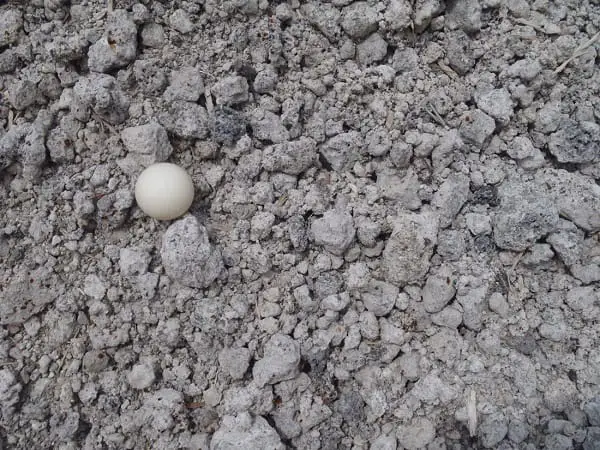
Image courtesy Hacker Services LLC (ping pong ball used to show relative size)
There is little difference between these two types of gravel are minor, but for a gravel shed foundation, the 21A variety is the better choice. Often referred to as “1-inch crusher-run gravel” both of these types of gravel have other fine materials mixed in with them. This material helps to fill in the gaps between the larger gravel pieces making it a more stable foundation that will not settle once your shed is placed on it.
The Wrong Types of Gravel for Your Shed Foundation
Gravel, Stone and Crushed Concrete over 1″ (with no smaller bits)
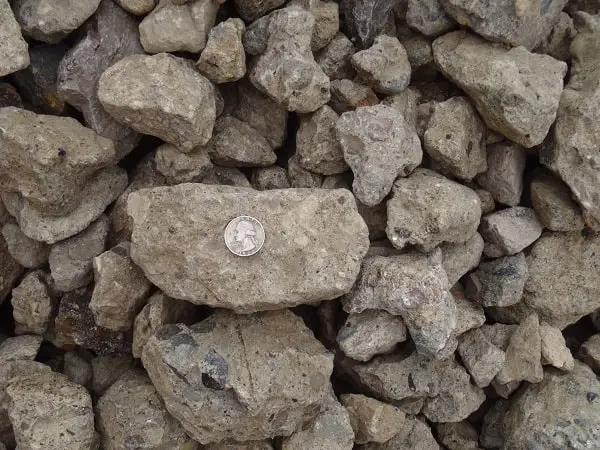
Image courtesy Hacker Services LLC
Although these grades of gravel can be similar in size to 21A and 21B, they do not contain any fine materials to help fill in the gaps. This means there is nothing to help hold the gravel in place leaving it to shift around rather than settle into a firm foundation. On top of this, once you place your shed on the foundation, the gravel can still move around, allowing your shed to sink into the ground. This can also cause your shed to become unlevel, which can cause damage to the structure.
Got Wood?
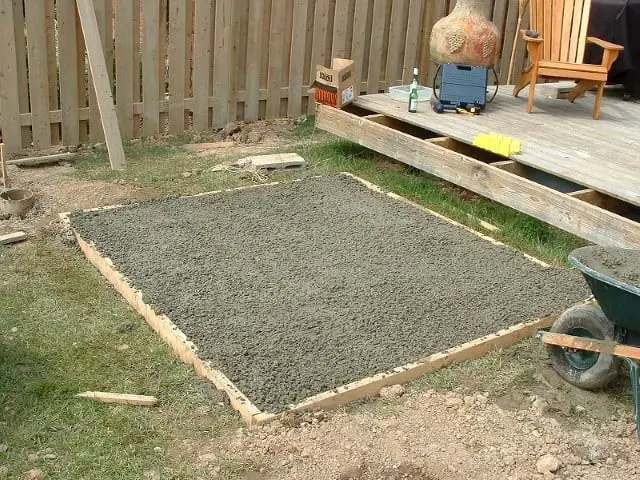
Image courtesy thecoverguy.com
If you decide to build a retaining frame around your gravel shed foundation rather than go with a free-form foundation, it is important you use the right type of lumber for the structure. The temptation might be to use standard lumber such as 2x6s to save money, but this is a bad choice. You may also be tempted to use creosote coated lumber such as old railroad ties. As long as you have no intention of growing edible vegetables or fruit within 50 feet of your foundation, this might be okay.
The problem with this is that creosote contains a range of toxic chemicals that are known to be hazardous to your health. The reality is that you really shouldn't use this type of lumber anywhere near your garden. Standard lumber is not strong enough, nor will it (as I found out the hard way) last very long once you bury it in the ground.
The best choice for building the framework around your gravel shed foundation is pressure treated lumber such as 4x4s or 6x6s. Not only will they provide you with a much stronger framework, being pressure treated will help ensure they last for many years without rotting and allowing the gravel to spread out, letting your shed down gradually.
Pinning the Timbers in Place
If you plan to build a framework out of timbers, they must be anchored in place before you pour the gravel into your form. If you plan to use a single layer of timbers, you can use lengths of rebar to secure them in place. However, if you need to use more than one layer of timbers, you should use galvanized spikes.
These are available in a variety of lengths to meet your needs at your local hardware superstore. Be sure to buy spikes that are long enough to go through the number of boards you plan to use and then at least 12 inches into the ground to ensure the timbers stay in place.
What Tools Do You Need?
Just like any other major project you plan to undertake in your garden, there are a certain number of tools needed to build a gravel shed foundation. Among these are:
- Shovel – There is lots of digging to be done
- Spirit Level – to ensure your finished shed is perfectly level
- Leather Gloves – to protect your hands
- Circular Saw – to cut the timbers to size
- Tape measure – for obvious reasons
- Small Sledge Hammer – to set the timbers and drive the spikes and rebar into place
- Vibrating Compactor – to compact the gravel in place before placing your shed
Let's Build a Gravel Shed Foundation
Now that I have gone over the basics regarding the materials you are likely to need, the next step is to go over building your gravel shed foundation one step at a time, starting with building a retaining wall.
Retaining Wall Construction
In order to determine how much timber it will take to build the retaining wall, you need to know the overall size of your shed and then add three feet to both the width and the length. This will provide you with enough room for your shed and an extended footer around it to help keep water from getting in it.
Mark Your Territory
Start by marking one corner of your shed with a stake and then mark the other three with stakes. Be sure you have added the required extra space. One way to be sure the stakes are set at the right spots is to measure diagonally between pairs of corners. Much like an equilateral triangle, these measurements should be the same.
Level the Ground
Using level find the lowest corner of the ground you plan to use and cut a trench into the ground that goes all the way around the perimeter of your shed. Bear in mind your timbers should be inside the lines created by the stakes you have driven into the ground. (Be sure you use the level to ensure the trench is perfectly level all the way around.
Start Building
Start out by laying your first layer of timbers in the trench. Next drill several holes through each board and secure them to the ground using rebar or galvanized spikes.
Add More Timbers
Wherever necessary, add in extra timbers offsetting each corner in much the same manner used in the construction of a log home. This will help to keep the timbers in place. Now secure the timbers together using galvanized spikes spaced out every two to three feet driven into the timber below.
Phase Two – Break Out the Shovel
Now comes the fun part, you have a hole in the ground inside the timbers for your gravel shed foundation, the only problem is that it is still full of dirt.
Getting Started
Grab a shovel a pair of gloves and a wheelbarrow to haul away the extra soil.
Start Digging
Depending on the size of your shed, you have a lot of soil to remove. So, put on your leather gloves, grab that shovel, and put it to work. You will need to remove enough soil to lower the level of the ground inside the frame you just finished building until it is at least four inches lower at its highest point below the top of the highest timber.
Add the Gravel
Finally, it's time to add in the gravel. Be sure you are using 21A or at least 21B gravel. Pour in no more than a 4-inch layer and then use the vibrating compactor to compact the gravel firmly in place. This ensures it won't continue to settle once you have your shed in place.
Make a Screed
Use a “screed” (which is a fancy name for a length of wood that reaches from one side of your timber frame to the other) to level the top of the gravel shed foundation. The screed will help reduce the high spots in your gravel by moving the excess gravel into the low spots, filling them in.
Layer by Layer
Continue doing this until the layer of gravel is level with or slightly below the top of your timbers.
Congratulations!
You have just finished building your first gravel shed foundation. Now all you need to do is install your shed and fill it with everything that goes with it.
Building a Free Form Gravel Shed Foundation
The only time you should consider building a free-form foundation for your shed is if the ground you plan to put it on is perfectly flat. If you try to use this type of foundation on sloping ground, there is the distinct possibility that the ground under your foundation will erode out from underneath it.
No matter whether you plan to build your free-form foundation on flat ground or a slope, be sure the gravel pad you create is approximately 18 inches bigger on all four sides than your shed. Doing this will allow for a certain amount of corrosion to occur without affecting the stability of your shed.
Start with Level Ground
On a level piece of ground, mark out the corners of your gravel shed foundation allowing for at least 12 inches on each side. Thus, if you have an 8 x 10 shed, your stakes should be set to create a space that measures 10 x 12 feet.
Grab Your Favorite Shovel
It's that time again, grab your gloves and favorite shovel. Remove the top four inches of sod and soil from the space between the markers.
Create a Temporary Frame
Using a number of 2x4s build a temporary framework around the sides of your foundation hole and stake them in place. You can use the stakes and timbers to create a level frame and set the height of the foundation.
Fill the Hole
Fill the hole in with gravel and use a screed to level off the gravel.
Compact the Gravel
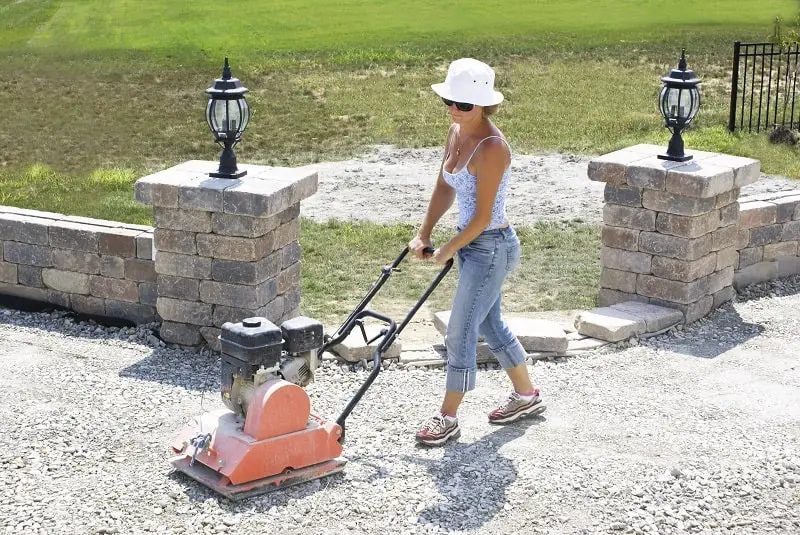
Use a vibrating compactor to compact the gravel add more gravel to the foundation until you have a pad that is perfectly level and well compacted, then remove the temporary framework.
Congratulations
Once again, congratulations you have built a gravel shed foundation ready to install your new shed in place.
Video
Here's a quick video of the process of preparing a gravel pad for your shed.
Important Notes
There are a few important notes you should be aware of before getting started.
- Never build your gravel shed foundation off level, the shed delivery people will only have to level it before they drop off your shed or you will before you can build on the pad.
- You can't get away with simply dumping the gravel on the ground and spreading it around with a rake, as this will not create a level foundation for your shed.
- Put the gravel down in layers and compact it in between each layer (stick to 4-inch layers). If you don't do this, the gravel will continue to settle after you put the shed on it.
- Use the right type of gravel, avoid pea gravel as this type of gravel cannot be properly compacted.
- If you plan to add a concrete pad over the gravel foundation, you must dig down at least 8 inches to allow for 4 inches of gravel and 4 inches of poured concrete.
- If you plan to add pavers to the top of the gravel, dig down at least 8 inches to allow for the thickness of the pavers and that sand layer you must build between the gravel and the pavers. The sand gives the pavers something to settle into that will help hold them in place and a bed that will ensure they won't crack.
Conclusion
Building a gravel shed foundation does involve a fair amount of hard work. But, the most important thing you need to keep in mind, is that whether you build a framed in foundation or a free-form one, it has to be as close to perfectly level as possible before you put your shed on it. If not, you face the possibility of soil erosion that could end up damaging your shed. I hope this information helps you create the perfect gravel foundation for your garden shed.
If you need more information why not join a Facebook group or check out the many projects on Pinterest.
Related Articles:
