What You Need To Know About Your Chicken Egg Incubator – Before You Start Hatching
Quick Navigation
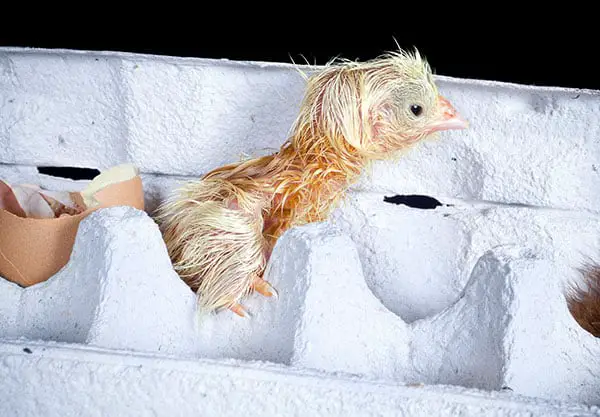
A lot of things are going on in a chicken incubator…
And while your chicks are developing inside of their safe little eggs you won't see a lot of progress
But make no mistake… Your new chicks will be dependent upon proper incubation for their survival. If your incubator is too hot or too cold your eggs won't hatch.
The wait is nerve-wracking… You may find yourself checking your eggs time and again for any progress
But it is worth it. There's nothing more satisfying than seeing your little eggs become chicks and your little chicks grow up and become brooders
Starting your chicks in an incubator is a great way to add to your flock or start your flock from scratch
It does take some time and effort to provide the optimal condition for your eggs. However, if you're properly prepared you'll be able to successfully hatch your eggs
**TIP read below carefully to learn the tricks you can use to to help speed the process along
What You Need to Know About Chicken Incubator Temperature And Humidity
Keep warm water in the humidity pan. Adjust your heat source to 99.5 Fahrenheit up to 102 Fahrenheit.
Keep a close eye on this and make sure that the incubator stays at 99.5 Fahrenheit at all times.
Allow it to settle on this for 24 hours prior to putting the eggs in the incubator.
Note: Many chicken farmers mistakenly think that the temperature has something to do with the gender of the hatchlings, this is not true.
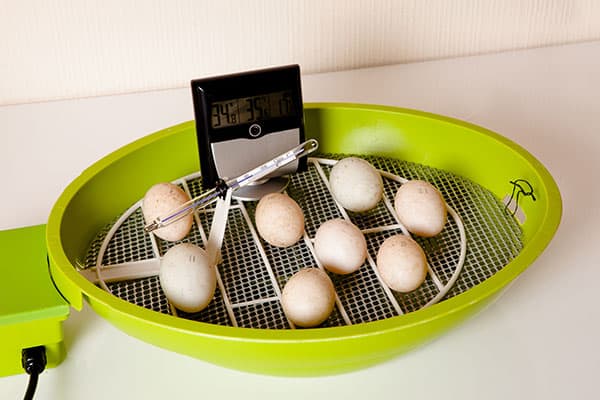
Note – Using a LCD display like the incubator above will make it a lot easier to stabilize the temperature and humidity in the incubator
What Happens if the Humidity Level in an Egg Incubator is Too High or Too Low?
It's vital to keep the door to your incubator closed as much as possible. Obviously, you're going to have to open it to turn your eggs, however, be sure that the rest of the time it remains closed.
Your little chicks require the proper humidity at all times to keep them from sticking to their shells and help them properly hatch.
Too little humidity and they won't be able to separate from their shell easily. Too much and they will be too wet. Keep the proper balance and follow the guidelines for turning closely.
How To Increase Humidity In Your Incubator
To maintain your humidity in your incubator you're going to need to add water to the water system.
You'll want to maintain a level of 40 to 50 percent humidity through day 18 of the incubation period. After that, you'll need to increase the humidity to 70 percent through the hatching period.
Use a hygrometer to check your humidity level and maintain it.

Stand alone Hygrometers typically cost $10 to $30
Homemade Chicken Egg Incubators
When it comes to chicken incubators, there are two ways to go. You can purchase an incubator or you can build your own. It's important to keep in mind that building your own will take a bit of skill. If you're in doubt of your skills you may opt to buy a ready made incubator.
Some people choose to build their own incubator. There's a sense of satisfaction of doing it all yourself.
You build the incubator, get your eggs, place them in the incubator and await the arrival of your new chicks. It's very satisfying and a great experience for everyone including kids if you have them.
If you do choose to build your own here are some guidelines and a list of what you'll require.
- A STYROFOAM CONTAINER such as a Styrofoam cooler. It should be large enough to hold up to 4 dozen eggs at a time. Old refrigerators also work well.
- A method to HEAT the incubator. Many chicken farmers use a 25 watt light bulb that is attached to a lamp that fits into a slot in the corner. Other chicken farmers also use a heating pad. You'll also need a thermometer to track how warm the incubator is
- PEBBLES OR STONES that can hold the heat. These will be placed in the bottom of the container
- WIRE MESH to separate the eggs from the heat source. When the eggs hatch this could be deadly to the chicks so it's best to preplan this to avoid any catastrophic injury
- BOWL WITH SPONGE. This is where you'll keep the water to maintain the proper humidity. Again, keep the bowl behind the mesh to avoid drowning any chicks that may hatch during the night. It can be kept on the floor of the incubator or off to the side near the heat source as long as it's blocked from the hatchlings
- HYGROMETER. This will help you to manage the humidity level. Some are attached to a thermometer so you could get one like this and use it to maintain temperature and humidity.
- A FAN. An issue with a homemade incubator is that there are hot and cold spots. You may wish to install a fan to help generate an even temperature.
Pros And Cons Of A Homemade Incubator
If you haven't had much or any experience with incubators before, then please take note:
PROS:
- Can be made from recycled items that you may already have on hand
- Easy to make if you're handy with tools
- Can be less expensive
CONS:
- Hatch rates are very low, sometimes as low as fifty percent
- More challenging to keep the temperature and humidity at the same level in the incubator
- Difficult to use if the room it's placed in has a fluctuating temperature
- More risk of bacteria unless extreme precautions are taken at all times
- Turning eggs in the incubator can be harder to do than a bought one
- No guarantees that it will work
What are the requirements for incubating eggs at home?

This is what a larger, semi-commercial chicken egg incubator looks like
Firstly, you'll need either a store bought incubator or a homemade incubator (instructions above).
Chickens are flock animals so it's always best to try and set at least six or more eggs at a time. This also increases the likelihood that you'll have hens and not all roosters.
It takes 21 days for a chicken egg to hatch. That is under optimal temperature and humidity conditions. If the eggs are allowed to cool down and then heat back up they may still hatch, but it will be later than 21 days.
Always give the eggs a few extra days in case you didn't realize that they had cooled down during the incubation period.
Your eggs need to be turned at least 3 times per day. This should be done at regular intervals. Many chicken farmers turn their eggs up to 5 times per day. A good way to do it is to use an indelible marker and mark an “X” on one side of the egg. This way, you can turn them all at the same time and you won't lose track of where you're at.
Turn the eggs for 18 days, then stop turning them so that the chicks have time to position for proper hatching.
Always wash your hands prior to turning eggs to prevent transmitting bacteria to the egg through the porous shell.
On or near day 21 you may see a pip in the shell. It can take the chick 24 hours to break out.
DO NOT attempt to assist the chick, this could result in the death of your chick. More than one chick has bled to death due to owner assisted escape from the shell.
There are fine blood vessels in the membrane that haven't yet stopped pulsating and if you break these the chick may bleed to death. It takes an average of five to seven hours for a chick to break free and it's not unheard of for it to take up to 24 hours.
Other Frequently Asked Questions:
Should eggs in an incubator be put small end down or up?
Place eggs in your incubator large end up. You'll be turning these regularly so if you get into the habit of this you'll know where you're at in turning them.
Also, if you are using an automatic turner, keep in mind that they tend to turn very slowly. Don't be alarmed if you're not seeing them move. Wait a few hours and check again. Likely the eggs will be turned by then.
What is the best humidity level for baby chicks?
The humidity level in your incubator should be at 40 to 50 percent during the first 18 days that your eggs are being incubated.
On the 18th day, raise the level of humidity to 70 percent. Use a hygrometer so that you can easily check the level of the humidity.
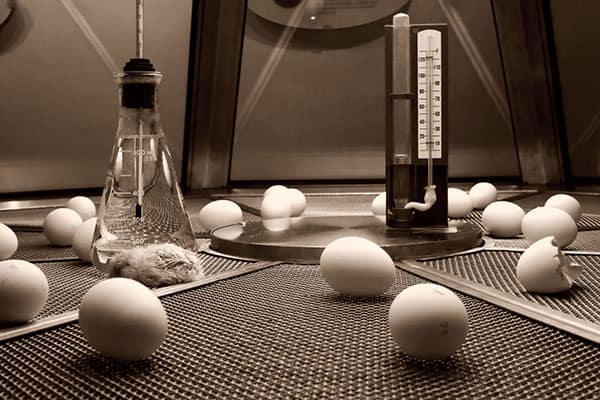
An older chicken incubator
What is the best way to run the Egg Stasis Test?
Egg stasis, or a period of time of inactivity, can be checked in the following manner
Place 12 fresh eggs on a tray. Be sure to estimate how long it took for the egg to arrive at your destination. Write this estimated date (date laid) on the egg in indelible marker.
Now, collect 12 fresh eggs from your own flock or a friends flock of chickens. Date these eggs as well with an indelible marker.
Keep in mind that the farm fresh eggs will remain in stasis for approximately 10 days. They are alive. The zygotes are waiting, however, they are not yet developing. They are in “egg hibernation”.
In the chicken pen, the mother hen would be deciding if she had enough eggs to sit on. If the hen doesn't show up to sit on her brood the eggs will simply not develop into chicks. At this point in time, they would begin to spoil. They will last for a few weeks with the bloom on.
After you've collected your eggs you can place them, one egg per day, into the incubator. Again, write the date on the egg. You can then determine if they are viable by day 21 of being placed into the incubator.
Keep in mind that the eggs should be stored at room temperature before being placed in the incubator for best results. Refrigerating the eggs will kill them.
When incubating a double-yolked egg, should an egg which appears to only have one fetus be removed?
If at all possible, it's best to avoid incubating a double-yolked egg. One or both of the fetuses may have issues developing properly.
If one fetus has issues it is highly likely that it may cause issues for the other fetus. While it does work on occasion, it's exceedingly rare and not likely to result in a healthy chick.
Should water placed in an egg incubator be sterile?
As long as the water is clean and doesn't have any debris or bacteria in it is fine. Tap water and well water are fine as long as there isn't any concern about germs or bacteria.
Some chicken farmers, however, are very cautious and will only use sterile water that they purchase at the store or they will first boil the water. Bacteria is a huge concern as the egg shells are porous and it can get into the shell and harm the embryo or chick.
If you bought a “fertile” egg at the supermarket and threw it in an incubator would you get a chick?
If you're purchasing fertile eggs at your local supermarket then yes, you could simply put it in the incubator and have a chicken hatch.
Keep in mind, however, that there is typically little chance of this unless the eggs are organic (much more likely to be fertile if they are organic) or free range (again, free range are also much more likely to be fertile than regular eggs).
If you wish to try this then be sure that the eggs that your purchases are free range or cage free. They also need to be fresh (neither having been stored at too high or too low of a temperature between the market and your home).
Although the odds are against it, more than one chicken farmer has tried putting a free range or cage free egg in an incubator and been successful.
In Summary…
Designing and building your own incubator is very satisfying. You get to watch the process of an egg turning into a chicken. You are in charge of turning and maintaining those eggs and taking care of them.
You're building your flock or starting your flock and tending mindfully over it. Everything you need to know to tend to your eggs in an incubator is in this article. Now all you have left to do is design your incubator and get started with your eggs.
Thanks for reading, if you liked the article why not share it and start a conversation with your friends and family about chicken husbandry!
Related Articles: